Up to date
This page is up to date for Godot 4.2.
If you still find outdated information, please open an issue.
Singletons (Autoload)
소개
Godot의 씬 시스템은 강력하고 유연하지만 하나 이상의 씬에 필요한 정보(예: 플래이어의 점수나 인벤토리)를 저장할 방법이 없다는 단점이 있습니다.
몇 가지 방법으로 이 문제를 해결할 수 있지만 한계점이 있습니다:
다른 씬을 자식으로 불러오거나 언로드하는 "마스터(master)" 씬을 사용할 수 있습니다. 하지만 그렇게 하면 더 이상 씬들을 개별적으로 실행할 수 없고 올바르게 작동할 것이라고 예상할 수 없습니다.
정보를 디스크의
user://경로에 저장한 다음 이를 필요로 하는 씬에서 로드할 수 있지만 데이터를 자주 저장하고 로드하는 것은 번거롭고 느릴 수 있습니다.
싱글톤 패턴은 씬 간에 지속적으로 정보를 저장해야 하는 일반적인 사례를 해결하는 데 유용한 툴입니다. 우리의 경우 여러 싱글톤의 이름이 서로 다르기만 하면 동일한 장면이나 클래스를 여러 싱글톤에서 재사용할 수 있습니다.
이 개념을 사용해서 다음과 같은 오브젝트를 만들 수 있습니다:
현재 실행 중인 씬에 관계없이 항상 불러와집니다
플레이어 정보와 같은, 전역 변수를 저장할 수 있습니다.
씬을 변경하는 것과 씬 사이에서의 전환을 다룰 수 있습니다.
GDScript가 전역 변수를 지원하지 않기 때문에 싱글톤처럼 작동합니다.
노드와 스크립트를 오토로드하면 위와 같은 특성을 적용할 수 있습니다.
참고
Godot won't make an Autoload a "true" singleton as per the singleton design pattern. It may still be instanced more than once by the user if desired.
팁
If you're creating an autoload as part of an editor plugin, consider registering it automatically in the Project Settings when the plugin is enabled.
Autoload
You can create an Autoload to load a scene or a script that inherits from Node.
참고
스크립트를 오토로드할 때 Node가 생성되고 스크립트가 여기에 추가됩니다. 이 노드는 다른 씬이 로드되기 전에 루트 뷰포트에 추가됩니다.

To autoload a scene or script, select Project > Project Settings from the menu and switch to the Autoload tab.
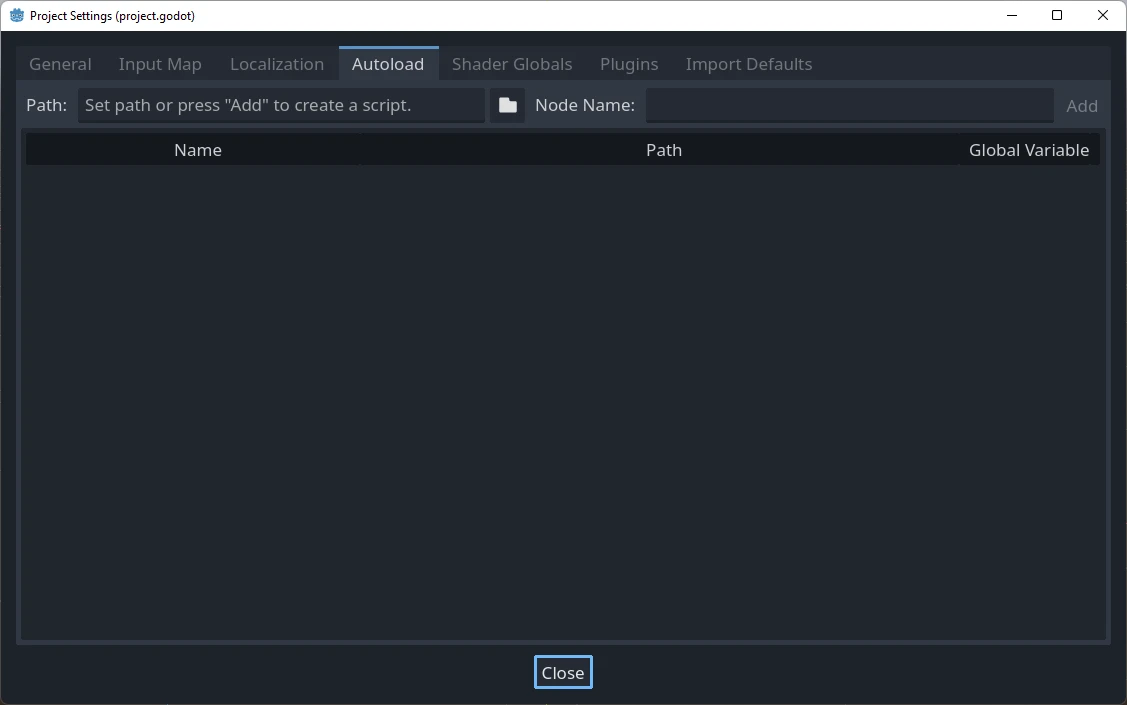
Here you can add any number of scenes or scripts. Each entry in the list
requires a name, which is assigned as the node's name property. The order of
the entries as they are added to the global scene tree can be manipulated using
the up/down arrow keys. Like regular scenes, the engine will read these nodes
in top-to-bottom order.
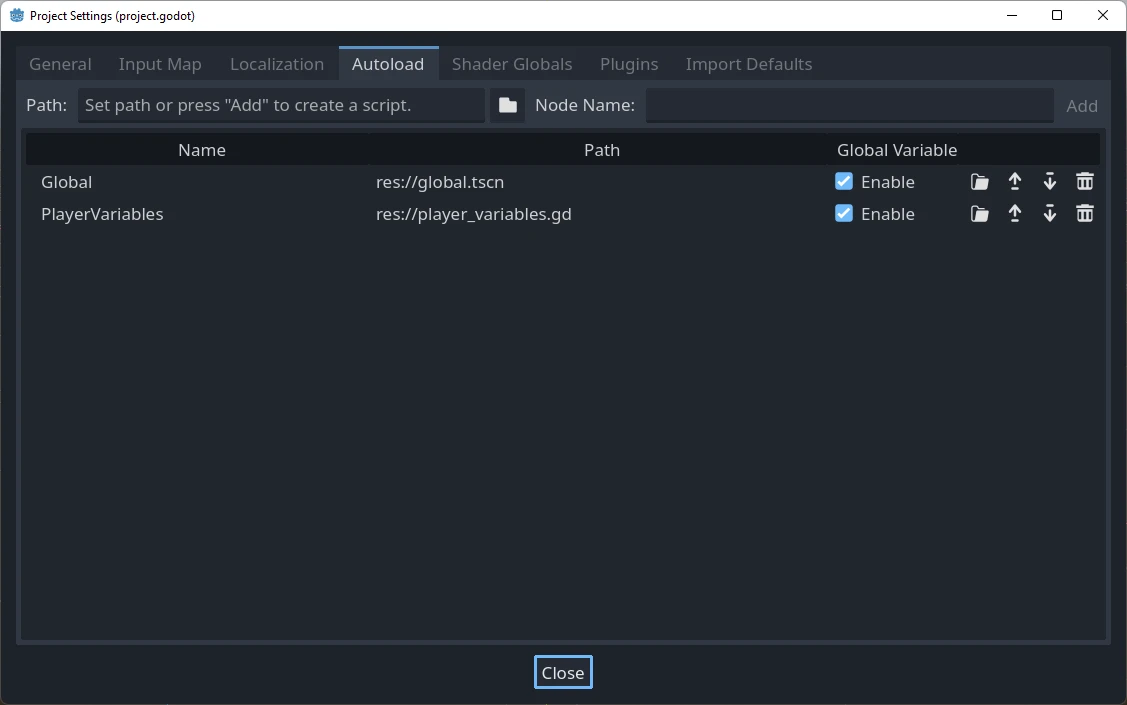
위의 경우 모든 노드에서 다음 코드를 사용해 "PlayerVariables" 라는 싱글톤을 접근할 수 있습니다:
var player_vars = get_node("/root/PlayerVariables")
player_vars.health -= 10
var playerVariables = GetNode<PlayerVariables>("/root/PlayerVariables");
playerVariables.Health -= 10; // Instance field.
If the Enable column is checked (which is the default), then the singleton can
be accessed directly in GDScript, without requiring get_node():
PlayerVariables.health -= 10
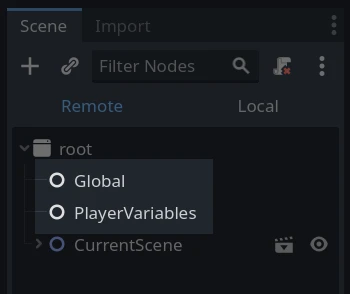
오토로드 오브젝트(스크립트 및/또는 씬)는 씬 트리의 다른 노드와 마찬가지 방식으로 접근할 수 있습니다. 실제로 실행 중인 씬 트리를 보면 오토로드된 노드가 나타난 것을 볼 수 있습니다:
경고
Autoloads must not be removed using free() or queue_free() at
runtime, or the engine will crash.
커스텀 씬 전환기
This tutorial will demonstrate building a scene switcher using autoloads. For basic scene switching, you can use the SceneTree.change_scene_to_file() method (see 씬 트리(SceneTree) 사용하기 for details). However, if you need more complex behavior when changing scenes, this method provides more functionality.
To begin, download the template from here: singleton_autoload_starter.zip and open it in Godot.
The project contains two scenes: scene_1.tscn and scene_2.tscn. Each
scene contains a label displaying the scene name and a button with its
pressed() signal connected. When you run the project, it starts in
scene_1.tscn. However, pressing the button does nothing.
Creating the script
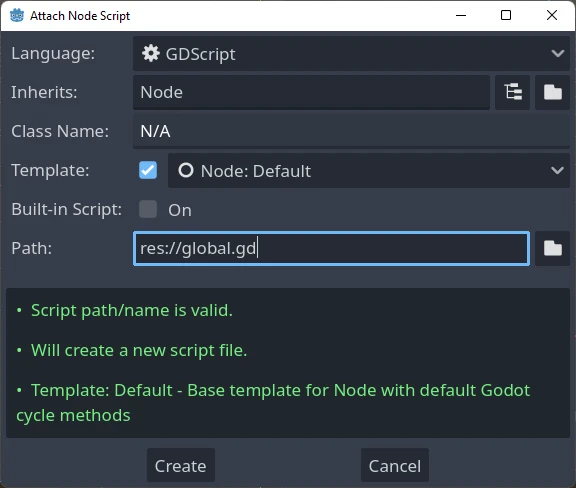
Open the Script window and create a new script called global.gd.
Make sure it inherits from Node:
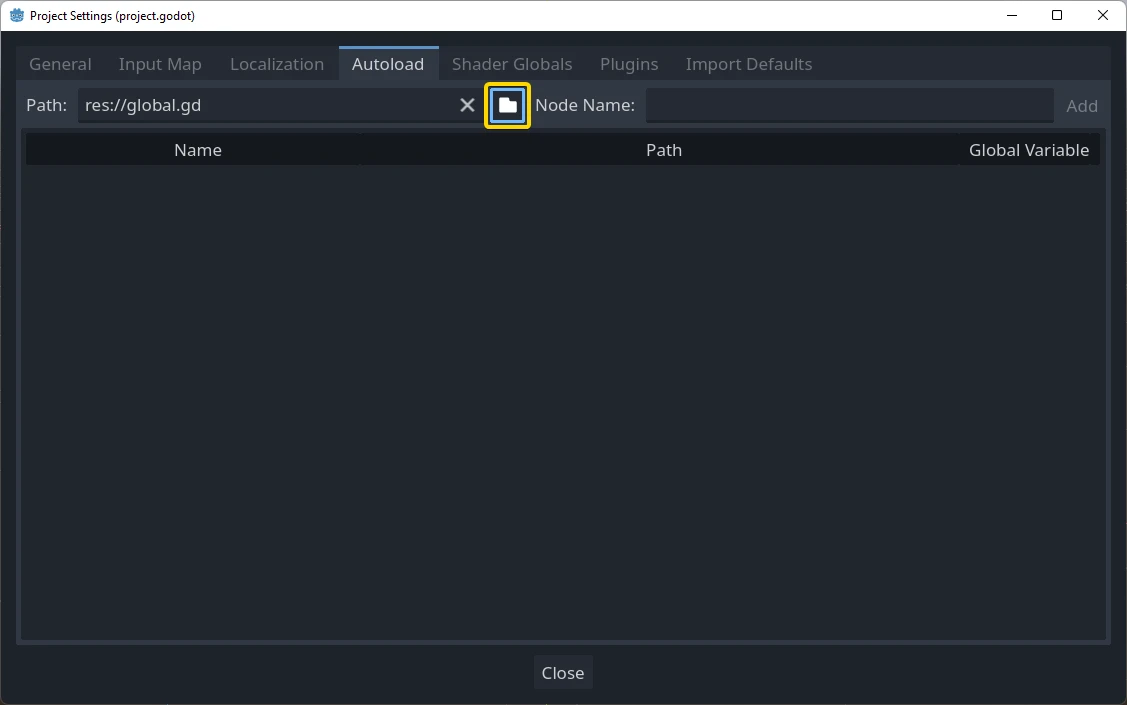
The next step is to add this script to the autoLoad list. Open
Project > Project Settings from the menu, switch to the Autoload tab and
select the script by clicking the browse button or typing its path:
res://global.gd. Press Add to add it to the autoload list:
이제 프로젝트에서 어떤 씬이든지 실행할 때마다 이 스크립트가 항상 로드됩니다.
Returning to the script, it needs to fetch the current scene in the
_ready() function. Both the current scene (the one with the button) and
global.gd are children of root, but autoloaded nodes are always first. This
means that the last child of root is always the loaded scene.
extends Node

var current_scene = null

func _ready():
    var root = get_tree().root
    current_scene = root.get_child(root.get_child_count() - 1)
using Godot;

public partial class Global : Node
{
    public Node CurrentScene { get; set; }

    public override void _Ready()
    {
        Viewport root = GetTree().Root;
        CurrentScene = root.GetChild(root.GetChildCount() - 1);
    }
}
이제 씬을 변경하는 함수가 필요합니다. 이 함수는 현재 씬을 해제하고 요청한 씬으로 교체해야 합니다.
func goto_scene(path):
    # This function will usually be called from a signal callback,
    # or some other function in the current scene.
    # Deleting the current scene at this point is
    # a bad idea, because it may still be executing code.
    # This will result in a crash or unexpected behavior.

    # The solution is to defer the load to a later time, when
    # we can be sure that no code from the current scene is running:

    call_deferred("_deferred_goto_scene", path)


func _deferred_goto_scene(path):
    # It is now safe to remove the current scene.
    current_scene.free()

    # Load the new scene.
    var s = ResourceLoader.load(path)

    # Instance the new scene.
    current_scene = s.instantiate()

    # Add it to the active scene, as child of root.
    get_tree().root.add_child(current_scene)

    # Optionally, to make it compatible with the SceneTree.change_scene_to_file() API.
    get_tree().current_scene = current_scene
public void GotoScene(string path)
{
    // This function will usually be called from a signal callback,
    // or some other function from the current scene.
    // Deleting the current scene at this point is
    // a bad idea, because it may still be executing code.
    // This will result in a crash or unexpected behavior.

    // The solution is to defer the load to a later time, when
    // we can be sure that no code from the current scene is running:

    CallDeferred(MethodName.DeferredGotoScene, path);
}

public void DeferredGotoScene(string path)
{
    // It is now safe to remove the current scene.
    CurrentScene.Free();

    // Load a new scene.
    var nextScene = GD.Load<PackedScene>(path);

    // Instance the new scene.
    CurrentScene = nextScene.Instantiate();

    // Add it to the active scene, as child of root.
    GetTree().Root.AddChild(CurrentScene);

    // Optionally, to make it compatible with the SceneTree.change_scene_to_file() API.
    GetTree().CurrentScene = CurrentScene;
}
Object.call_deferred()를 사용하면 두 번째 함수는 현재 씬의 모든 코드가 완료된 후에만 실행됩니다. 따라서 현재 씬이 사용 중인 동안에는 제거되지 않습니다(즉, 해당 코드가 계속 실행 중임).
마지막으로, 두 씬에서 비어있는 콜백 함수를 채워야 합니다:
# Add to 'scene_1.gd'.

func _on_button_pressed():
    Global.goto_scene("res://scene_2.tscn")
// Add to 'Scene1.cs'.

private void OnButtonPressed()
{
    var global = GetNode<Global>("/root/Global");
    global.GotoScene("res://Scene2.tscn");
}
그리고
# Add to 'scene_2.gd'.

func _on_button_pressed():
    Global.goto_scene("res://scene_1.tscn")
// Add to 'Scene2.cs'.

private void OnButtonPressed()
{
    var global = GetNode<Global>("/root/Global");
    global.GotoScene("res://Scene1.tscn");
}
프로젝트를 실행하고 버튼을 누를 때마다 씬이 바뀌는지 확인해보세요.
참고
씬이 작다면 씬 전환이 빠르게 됩니다. 그러나 씬이 더 복잡한 경우 표시되는 데 상당한 시간이 걸릴 수 있습니다. 이를 처리하는 방법을 배우려면 다음 튜토리얼 백그라운드 로딩을 살펴보세요.
로딩 시간이 비교적 짧은 경우(3초 미만) 장면을 변경하기 직전에 일종의 2D 요소를 표시해서 "로딩 플라크(plaque)"를 표시할 수 있습니다. 그런 다음 씬이 변경된 직후에 숨길 수 있습니다. 이는 장면이 로드되고 있음을 플레이어에게 알려주는 데 사용할 수 있습니다.